I first heard about the KMG (Knifemaker's Grinder) on one of the knife forums. I had been searching for a new grinder for a couple of years, but all the major brand grinders had issues that for one reason or another made me shy away. Some were mechanical reasons, and others were the way that I was treated when speaking to the company representative(s). I'm the kind of person that expects to have all my needs met when I plunk down the kind of money that a new machine costs. When I first saw photos of the KMG grinder, I was immediately impressed by how "heavy duty" yet simple the machine looked.....I had to know more.
I contacted Rob Frink, of Beaumont Metal Works, and began negotiating on a grinder. Rob is a very personable individual, and was more than willing to ensure that I got the grinder to fit my needs. For a couple of weeks we talked, emailed, and discussed exactly what it was that I wanted in a grinder. My favorite grinder has always been the Wilton Square Wheel, and I had high hopes of purchasing a new variable speed Square Wheel grinder. But after having seen the newer ones first hand, I was disappointed in that the newer models where very "flimsy" compared to my 14 year old model.
Since 95% of what I do is convex grinding, my most used attachment is a modified flat platen, which can be rotated to several different positions, I asked Rob if he could build me a custom platen for the KMG. When he said "Sure." I was sold.
First Impressions...
When the grinder arrived, it was packed very well, in a heavy cardboard container, framed in wood to protect the precious cargo. At first look, my initial thought was..... "This thing is built like a tank!"
The KMG is a fairly simple design, compact in size, but is possibly the most overbuilt grinder available. (all of which are things I very much like)
The machine I ordered was the KMG-1, with the exception of having Rob custom build the platen. I gave the grinder a quick once over right out of the box, made sure all of the bolts/screws were tight and proceeded to set it up on my bench.
From the beginning I knew that I wanted the machine to be variable speed, and after having worked with some machines with 1 to 1.5 hp variable speed motors, knew I wanted more power. Bill Cottrell located a 3hp, shunt wound, Blador DC motor on E-bay for $200! What a deal! The speed controller I had chosen was a Baldor model BC-160. Now this motor is not for the faint of heart.........at 134 pounds, and 22" in length, it was a chore just to lift. With the limited bench space I have, I decided to mount the motor UNDER the bench, in a manner very similar to those used on table saws. I custom fabricated the mounting hardware, and mounted the motor under the bench prior to the grinder ever arriving.
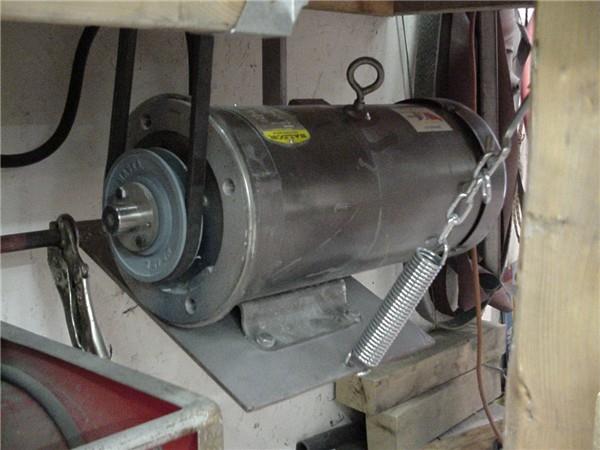
Once the grinder was set up on the bench, and everything hooked up, the trial runs began. Initially I had set the grinder up with a "link" type belt, and immediately found that it produced far too much vibration. I quickly changed to a standard "V" belt, and the problem was solved. I've not had good experiences with using "link" belts...therefore, I recommend using a heavy duty "V" belt.
This photo is the grinder as it came out of the box. Notice how heavy duty the machine is built!
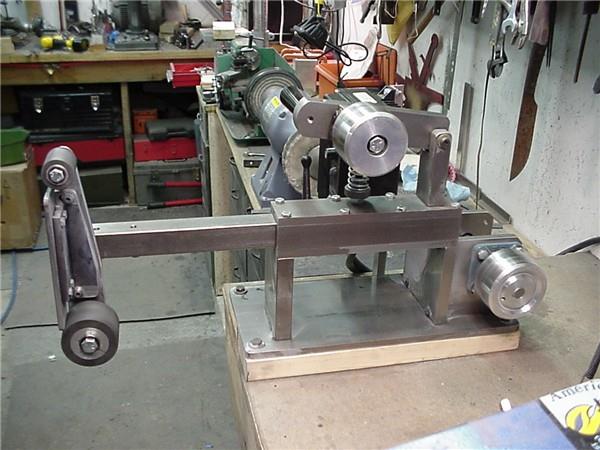
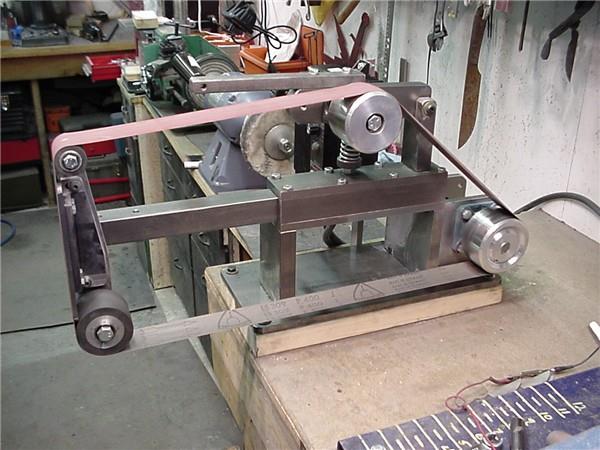
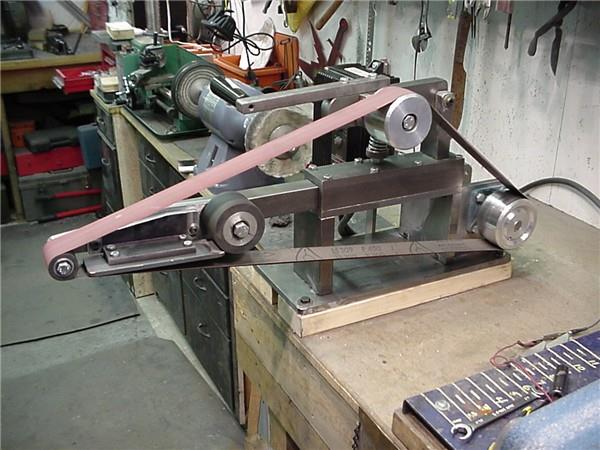
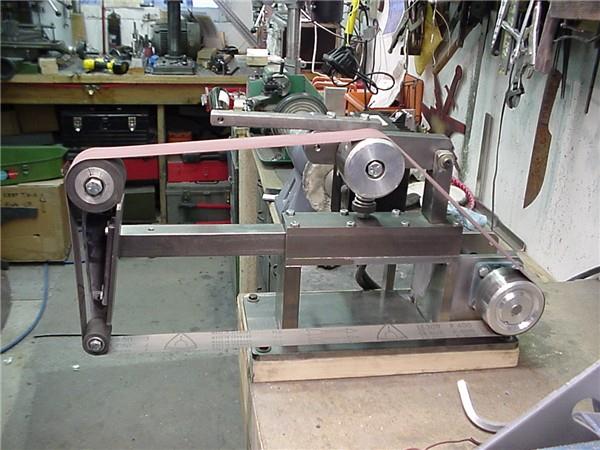
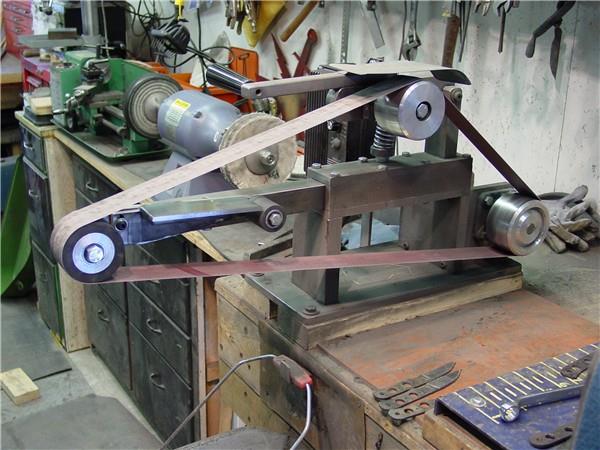
Notice the Platen. Rob built a platen that I designed...it has a 1 1/2" smooth contact wheel, and the bottom roller was replaced with a 3" smooth contact wheel. I offer plans to completed platens of this type here. The "Caffrey Platen is also available from Beaumont Metal Works
The following photo shows the method which the tooling arm uses to mount the various attachments....
the tooling arm is split, with a 3/4" hole that mates with a 3/4" "stub" (this is the type of system used on the Square Wheel, and I wanted to have the ability to interchange attachments.) It only takes a turn of the Allen head bolt to change out attachments. (this is a custom modification I designed)
the tooling arm is split, with a 3/4" hole that mates with a 3/4" "stub" (this is the type of system used on the Square Wheel, and I wanted to have the ability to interchange attachments.) It only takes a turn of the Allen head bolt to change out attachments. (this is a custom modification I designed)
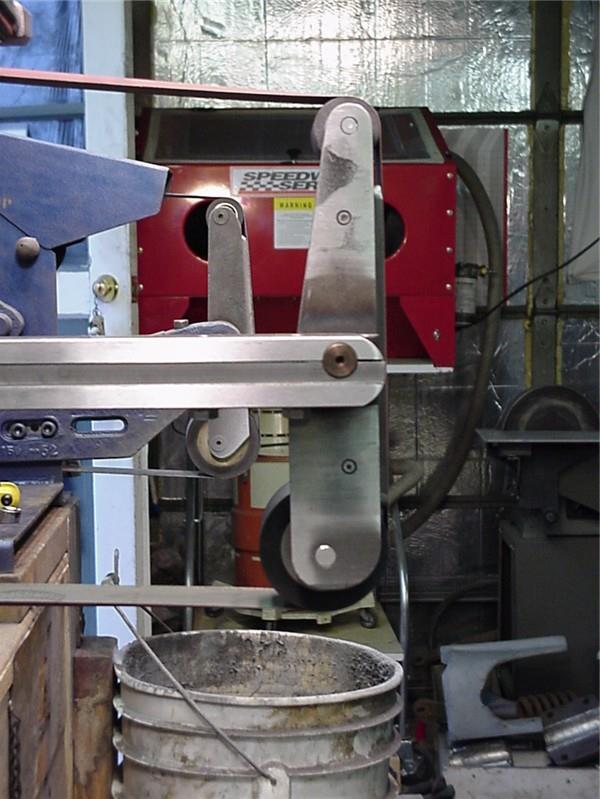
The 8" contact wheel (from my Square Wheel)
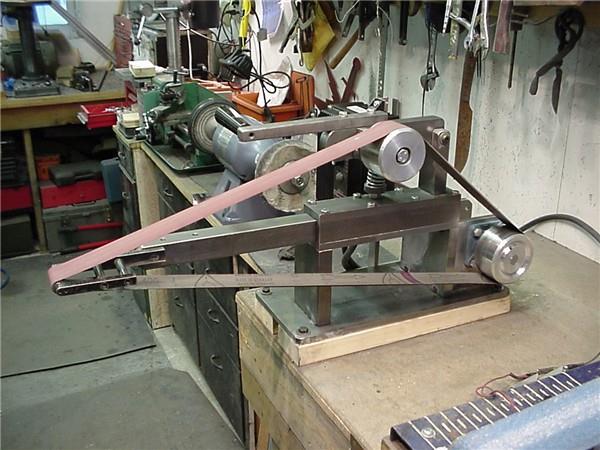
Following are all of the various positions that the "Caffrey platen" can utilize.
Minor modifications... make a good thing even better...
The first time I installed a grinding belt on the KMG, it was a wrestling match. The very short idler arm makes for very little leverage, and can make changing belts tough. My solution was to increase the length of the idler arm, by adding an extension. I used a 10" piece of 3/4"X 1" bar. Drilled and tapped the original idler arm, and bolted the extension on..........problem solved! (I also relocated the handle from the original position, to the end of the extension.)
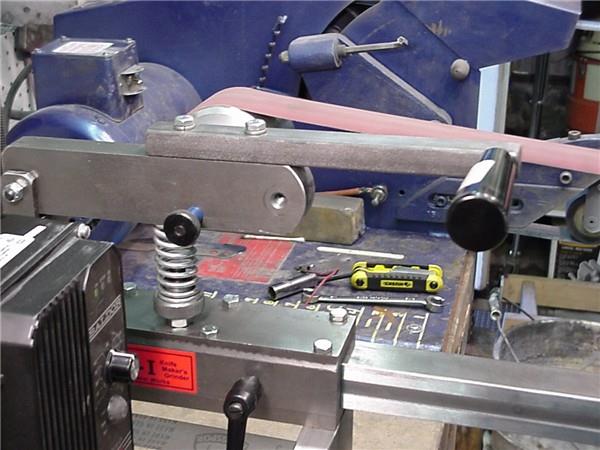
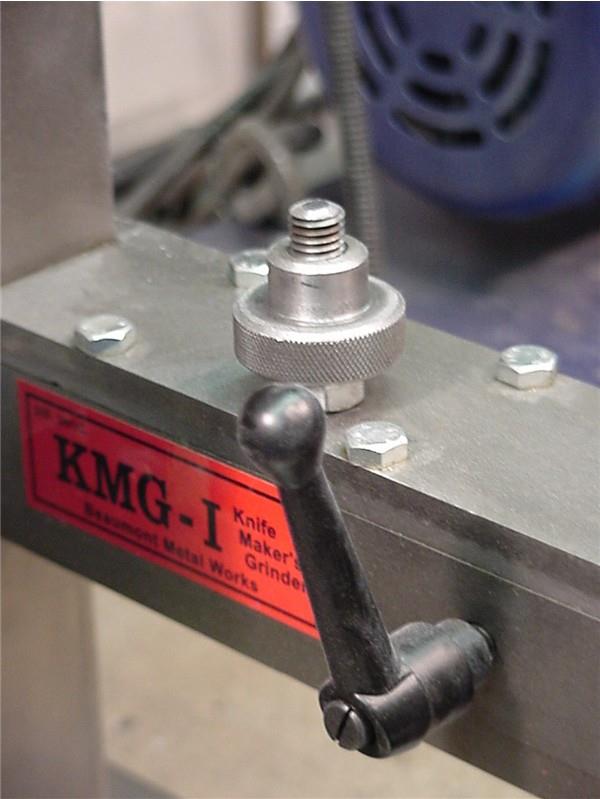
After grinding on the machine, trying different set ups for the flat platen, I noticed that often times it was necessary to slide the tooling arm in or out to achieve the correct belt tension. Sometimes this was necessary to get the belt onto the machine. After some close inspection, I noticed that the "all thread" bolt which supports the idler arm tension spring was binding, and keeping the idler arm from compressing. I removed the idler spring, took out the bolt, and shortened it approx. 1/2".......It did the trick! After re-installing the bolt, I was able to move the flat platen to any of the four positions without having to adjust the tooling arm length. The tooling arm still requires moving when major attachments are changed, but that is certainly no big deal. (Below is the photo of this modification)
Platen modifications...
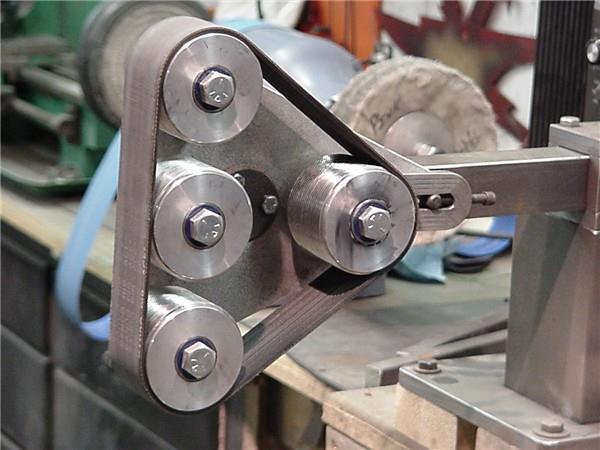
Rob was kind enough to offer me a testing period with one of his new "Rotary" platens. This is a platen that was conceived by Ken Onion, and brought to life by Rob. This attachment is a great addition to any serious knifemaker's shop! It consists of 4 "ribbed" wheels, and a 2" wide, seamless, industrial flat belt. The tension of the belt on this attachment can be changed to create anything from a heavy convex, to an almost flat grind. But that is only half of the benefits. It increases belt life, as well as giving a much better finish on any grit when compared to using a hard flat platen. Pictured is the 1st generation Prototype, and Rob has since completed a next generation model that I believe shows more promise than the first! Even though I've only used this attachment for a few weeks, you can bet that one will be in my shop permanently!
The last modifications I have done were for no other purpose than to suit my way of grinding. At times, a bit of slack belt space on the platen means I can perform different operations without having to change things around. I took approx. 1/2" off of the bottom of the platen holder, and created two additional bolt on platens. One short, so that I could have the slack belt space I mentioned previously, and another that is FULL length for when I need as much flat area as I can get. Both were very simple, and gave even more versatility to a great grinder.
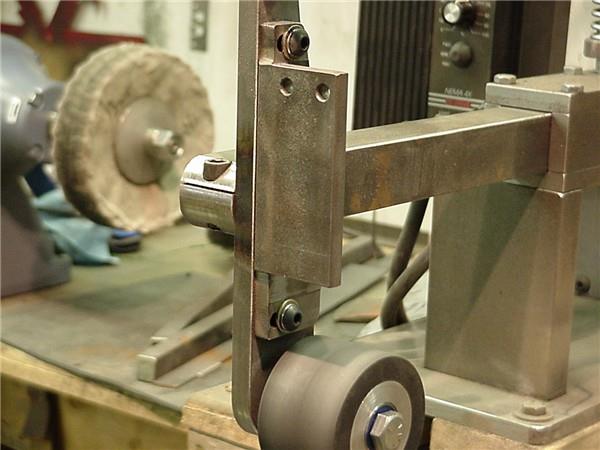
This photo shows where I cut off the bottom of the platen holder to accommodate the short platen
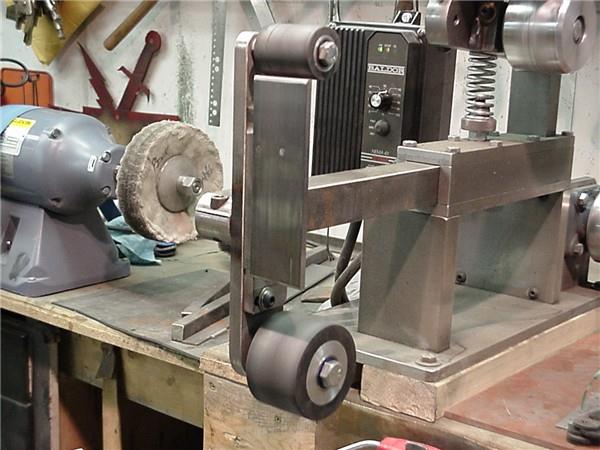
Here is a photo of the short platen installed, which gives me that bit of slack belt area
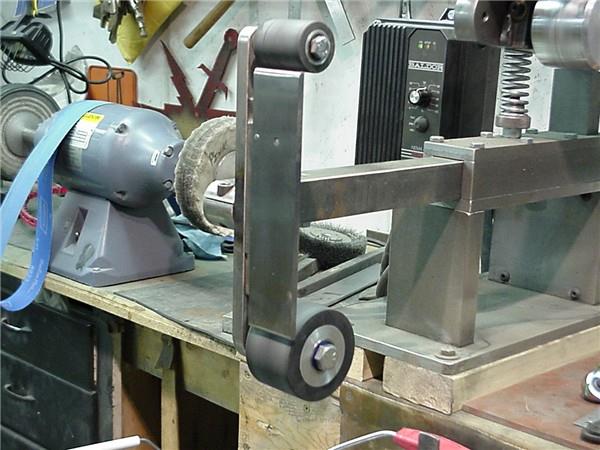
Finally....Here is the long platen installed
Conclusions...
This machine is a WINNER! It is more heavy duty than any other grinder on the market. The craftsmanship is outstanding, and Rob Frink is one of the best folks to work with that you will ever find.
Even though I wrote about some modifications, don't take them too seriously. I am one of those people who wants things in the shop just so so, and the modifications that I did were to suit my preferences. If you have special needs/desires for a custom built machine, inquire with Rob, he knows what will or will not work, and can give you guidance.
If you are looking for a grinder that is smooth, quiet, and built to withstand the test of time, I suggest you look into the KMG grinders. I predict that with the type of customer service he offers, and the quality of machines he builds, Rob Frink and the KMG will be at the top of the Knifemaking Grinder market within a short time!
Suffice to say that by looking around for componets, this grinder was less expensive than any of the "top" brand name variable speed machines............plus it's twice the grinder!
(Grinder prices vary depending on options and custom modifications, therefore it is best that you contact Beaumont Metal Works for pricing on specific grinder/option combos.)
Considering the economy of the KMG , and the quality machine you get, I HIGHLY RECOMMEND these grinders. Thanks to Beaumont Metal Works for creating a great grinder!
After a number of years, I recently changed my KMG over to Direct Drive! I fabricated a motor mount plate, removed the original driveshaft and stanchions, and replaced them with the motor mount plate and a new 3hp/1740 RPM motor..... WHAT A BEAST! :)
KMG-1 with custom flat platen
KMG-1 with custom flat platen
At the time I purchased my KMG, there was no such thing as VFDs, therefore to achieve variable speed, I was forced to go with a DC motor and DC controller. Honestly, I've been waiting for this motor/conroller to go out, so I can replace it with a VFD and a 3-phase motor. In my opinion, a KBAC VFD conctroller (model 24D or model 27D depending on motor HP is the only way to go. For a motor, a TEFC is a must, and again, in my opinion, 2HP minimum. Motor brands I prefer are Baldo or Leeson.
The Original KMG Grinder... The Best Bang for the Buck Grinder

"Nobody Cares What you Know...
Until They Know You Care!"
Until They Know You Care!"

406-727-9102
Copyright 2024/25: "The Montana Bladesmith"

